cobby Excel overview & cobby Portal
cobby Excel overview & Portal
What do I do in which interface?
Feel free to check out our demos below for cobby Portal and cobby Excel to get a better overview.
cobby Portal
Manage your cobby accounts & shops
• Connect your shop(s)
• Download the plug-ins
• Overview of jobs & product history
cobby Excel
Do your product maintenance
• All your product data in Excel
• Load, edit, save product data via cobby
Demo - cobby Excel
In this demo, we will show you how cobby is set up as your interface for product maintenance.
If you want to re-read something, you can find the corresponding step-by-step instructions under each demo.
Go to the English version.
Step-by-Step Guide
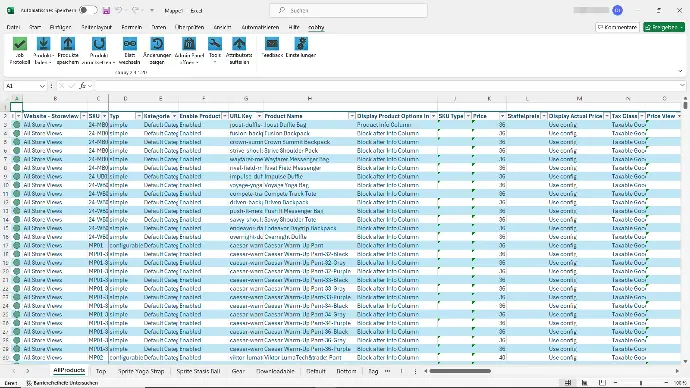
1. Overview of articles, attributes, and attribute sets
If your products have been loaded into Excel, they are arranged as follows:
- The products are listed per row.
- The attributes are listed in columns.
- The spreadsheets are filtered by the attribute sets in your shop.
- In the worksheet AllProducts, all products are displayed.
2. Product status
The status of your products is displayed at the very front in the first column.
3. Task Pane
Depending on which column you click on, the cobby Task Pane opens with additional options.
4. cobby formulas
With the Insert Function button (fx), you can not only insert regular Excel formulas but also cobby formulas, which can be particularly helpful for image maintenance.
To do this, select "cobby" from the category and click on a cobby formula. A window will then open where the function parameters can be filled in.
5. Required fields
If required fields are not filled out, they will be displayed in red.
6. Additional Columns / Auxiliary Columns
If you add more columns, they will be yellow because these are just internal columns or auxiliary columns. They have no impact on your product data.
Demo - cobby Portal
Time to introduce you to the cobby portal for managing your shop.
You can find the step-by-step guide as always under the demo. Let's get started!
Go to the English version.
Step-by-Step Guide
1. Dashboard
You always start on the dashboard of the cobby portal. Here you can view the shop status and download the Excel plugin.
2. Create or select a workspace
Clicking the arrow in the left sidebar opens a drop-down menu. From here, you can select an existing workspace or create a new workspace using the "Create new" button.
[Learn more about it
3. Presets: Create and manage presets
In the Presets menu, you can create your own presets or manage existing presets.
[Learn more about presets here in our article.]
4. Job history
In the job history, you will see all completed or current jobs and their status.
[Learn more about it here in our docs.]
5. Product history
In the product history, you get an overview of your products and certain attributes such as SKU, product type, and modification date.
[Learn more about the product history here.]
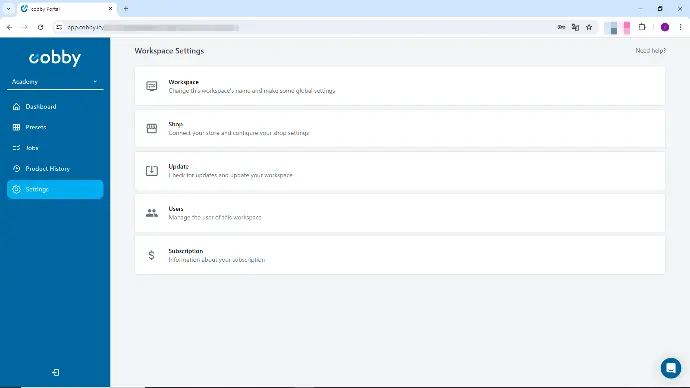
6. Settings: Workspace, Shop, Update, User, Subscription
In the Settings menu, you have access to various areas:
- 6.1 Workspace
Here you manage the name and the license key. You can also activate the Excel login dialog and the support access. If you want to delete your workspace, you can do that here. - 6.2 Shop
Here you can find the type of your shop (Type) as well as the status that indicates whether your shop is connected (State). You can also download the Excel Plugin (Excel Plugin) and check your shop connection (Check Connection) here. Through Actions, you can perform a resync, which is necessary for the synchronization between cobby and Magento. Additionally, you can download the Magento Plugin (important only for the initial installation) and change your shop credentials.
When you should perform a resync, you will find out here. - 6.3 Update
Perform updates of the Excel plugin, the Magento extension, or the cobby PIM here.
Here you learn more about updates. - 6.4 Users
Add new users or appoint existing users as owners.
Read here more about using cobby as a team. - 6.5 Plans & Billings
Here you can check your current payment plan and payment details.
Momentan sind keine Kommentare vorhanden.
, um als erster einen Kommentar zu hinterlassen.